How to Declutter Before Storage
Your home did not fill up in a day, so it will not clear out in a day either. Our decluttering checklist breaks down the work of how to declutter your home into small daily steps that take about 20 to 30 minutes each. By the end of the next month, you can have clearer counters, roomier closets, and a home that feels easier to live in.
Follow Storage Sense’s 30-day decluttering checklist to help get rid of extra belongings and organize your primary storage area as you are moving other items into storage. You do not have to decide everything this week. Find a storage unit near you and give yourself time.
In This Guide:
Supplies and Methods You Need to Declutter Your Home
30-Day Decluttering Challenge Checklist
How to Declutter Sentimental Items and Keepsakes
When Self Storage Makes Sense During Decluttering
How Storage Sense Helps You Stay Organized
What You Need to Declutter Your Home
Make Digestible Tasks Into A Daily Routine

Carve out time in your normal routine, such as right after breakfast or just before dinner, to handle one small task each day. Set a timer for 20 to 30 minutes to motivate yourself. Short, steady effort is easier to keep up than one exhausting marathon day.
Gather Simple Supplies
You do not need fancy gear to get organized. Set these items near your starting spot each day to make it easy to get started on your decluttering task:
- Trash bags
- Four or five boxes or bins
- Sticky notes or painter’s tape for labels
- A marker and a notebook
- Gloves and a damp cloth for dusty shelves
- A timer, such as the one on your phone
Use the Four-Box Method for Analyzing Clutter
Label four boxes: Keep, Donate, Sell, and Toss. Then add a fifth box called Maybe. Write a date 30 days from now on the Maybe box. If you have not opened it by that date, you can let the items go with a clear mind. As you are moving through different areas of your home, use these boxes to clear away items that are no longer serving you.
When you are looking over an item, ask yourself some quick questions:
- Have I used it in the past year?
- Does it still work? Is it broken in any way?
- Does it fit my home today?
Several “no” answers point toward the Donate, Sell, or Toss box.
30-Day Decluttering Challenge with Storage Sense
Download our decluttering checklist to mark off your organization progress as you work through the month.
Week 1: Warm Up With Quick Wins
Week one builds momentum. You will work in small spaces where results show up fast.
☐ Day 1: Do a trash sweep. Walk through your home with a trash bag. Pick up obvious trash, broken items, and dried-out pens. Easy wins come first.
☐ Day 2: Clear the kitchen counters. Keep only what you use each day, like the coffee maker. Move the rest into a cabinet or the Donate box.
☐ Day 3: Empty the junk drawer. Toss old takeout menus and mystery keys. Set loose batteries aside for recycling. Put the rest into small containers.
☐ Day 4: Sort the bathroom cabinets. Toss expired lotions and old makeup. Set aside expired medicines and ask your pharmacy about safe disposal.
☐ Day 5: Clear the entryway. Sort shoes, coats, and bags by season. Donate anything that no longer fits.
☐ Day 6: Tame the paper pile. Recycle junk mail. Shred papers that show personal information. Keep one small tray for papers that need action.
☐ Day 7: Make your first drop-off. Take your Donate box to a local charity or thrift store. Then pause and look at the space you cleared.
Week 2: Tackle the Everyday Rooms
Now you move into the rooms you use most. Keep your four boxes close.
☐ Day 8: Sort the pantry. Check dates and toss expired food. Group similar items together so you can see what you own.
☐ Day 9: Clean out kitchen cabinets. Pull out duplicate tools and mugs you rarely use. Match each container with a lid, or let it go.
☐ Day 10: Clear living room surfaces. Clear the coffee table, shelves, and media stand. Return stray items to their rooms and untangle old cords.
☐ Day 11: Edit books, movies, and decor. Choose your favorites and donate the rest. Leave some open space on shelves so the room can breathe.
☐ Day 12: Clear nightstands and under the bed. Keep what helps you rest, like a lamp and a book. Move everything else out.
☐ Day 13: Sort the dresser drawers. Pull out clothes that no longer fit or that you have not worn in a year. Fold the rest so you can see each piece.
☐ Day 14: Prep your Sell box. Take clear photos of items you want to sell. List them on a local marketplace or take them to a consignment shop. Drop off another Donate box.
Week 3: Dig Into Closets, Garages, and Memories
Week three takes more time and more heart. Go slowly and take short breaks.
☐ Day 15: Edit the bedroom closet. Try the hanger trick. Turn all hangers backward. After you wear an item, hang it the right way. Donate whatever still hangs backward after a few months.
☐ Day 16: Refresh the linen closet. Keep two sets of sheets per bed and a few towels per person. Ask a local animal shelter if it takes old towels.
☐ Day 17: Sort toys and games. Let your kids help choose what to donate. Toss broken toys and games with missing pieces.
☐ Day 18: Organize the garage workbench. Group tools by job. Toss rusty or broken ones and label your bins.
☐ Day 19: Sort hazardous items safely. Paint, batteries, cleaners, and motor oil need special care. The EPA lists paints, solvents, motor oil, and car batteries as examples of household hazardous waste. It strongly recommends against pouring them down drains, onto the ground, or into storm sewers. Federal law allows some household waste to go out with regular trash, but your state may have stricter rules. Call your city or county waste office to find a drop-off site or collection event. Keep products in their original containers until then.
☐ Day 20: Open the attic or basement. Start with the boxes nearest the door. Open each one and decide right away. Do not repack anything you have not looked at.
☐ Day 21: Handle sentimental items. Pick one small memory box for each family member. Photograph large keepsakes before you pass them on. Keep the items that bring back a story.
Week 4+: Organize Your Space for The Items That Are Staying
The last stretch is about wrapping up and making smart choices about what to do with your keepers.
☐ Day 22: Clear the home office. Sort files, tame cords, and recycle old chargers. Keep the desk top open for work.
☐ Day 23: Trim digital clutter. Delete duplicate photos and unused apps. Back up the photos you want to keep.
☐ Day 24: Sort seasonal items. Look through holiday decor, sports gear, and camping supplies. Keep what you use and decide which items need a home outside your daily living space.
☐ Day 25: Clear outdoor spaces. Tidy the patio, shed, and yard tools. Donate or toss tools you no longer use.
☐ Day 26: Reset the car. Empty the trunk and glove box. Keep only the basics you need on the road.
☐ Day 27: Open the Maybe box. Be honest about each item. If it has sat unused for 30 days, it is likely ready to go.
☐ Day 28: Make a haul day. Deliver donations, schedule any pickups, and finish your sale listings.
☐ Day 29: Walk through each room. Look at your home with fresh eyes. List the items you want to keep but do not need every day. These are your candidates for self storage. Count large pieces and boxes.
☐ Day 30: Celebrate and set a routine. Enjoy what you have done. Pick a weekly 15-minute reset so clutter does not sneak back.
How to Declutter Sentimental Items
Sentimental items are the hardest things to sort because each one holds a memory. Letting go of a keepsake does not mean letting go of the person, place, or time it reminds you of.

Photo by Kristyna Squared.one on Unsplash
For some people, the challenge is even bigger.
Parents of kids at every age are trying to decide which artwork, outfits, and trophies to keep. Empty nesters are endlessly sorting through years of childhood keepsakes, whether their college students are freshly out of the house or their adult children have been moved out for years. Families clearing an estate are handling a loved one’s belongings during a difficult time. Seniors who are downsizing must fit a lifetime of memories into a smaller space.
Military families often move from base to base and have to get their packing down to a science. Hobbyists and collectors may have shelves full of items that mean a great deal to them.
If you see yourself in any of these groups, be patient with yourself. A storage unit can give you room to take your time.
Tips for Decluttering Sentimental Items
- Start small. Begin with one box, one shelf, or one drawer. Early wins build confidence for the harder items.
- Do not go it alone if you do not want to. Ask a trusted friend or family member to sit with you. They can help you stay on track and listen to the stories behind each item.
- Keep the best, not all. Choose the one item that tells the story best, such as one quilt out of five or one trophy out of twenty.
- Take a photo first. A picture lets you remember an item you cannot keep. Store the photos in a labeled folder, a printed album, or a cloud backup.
- Ask who else wants it. Before you donate or toss an item, check with family members. Many keepsakes find a good home with a child, grandchild, or cousin.
- Share the stories. Tell the story behind an item to someone you love before you decide. Sometimes the story matters more than the object.
- Give items a new purpose. Turn old T-shirts into a quilt, frame a few pieces of artwork, or display a collection in a shadow box. A few well-chosen items often mean more than a full closet.
- Know when it is worth checking value. Have jewelry, art, antiques, and collectibles appraised before you sell or donate them.
- Be kind to yourself. It is normal to feel sad, nostalgic, or even guilty. Take a break whenever you need one. There is no deadline for feeling ready.
When You Are Not Ready to Decide
It is okay to take your time. If an item still feels too hard to sort, pack it in a labeled bin and place it in storage. Set a reminder to look again in three to six months. Often, a little distance makes the choice easier.
When Self Storage Makes Sense During Decluttering
Decluttering does not mean you must part with everything. Some items matter a great deal to you but do not need to take up prime space in your closets. This is where Storage Sense can help. A storage unit gives those items a place of their own while your home stays open and easy to use.
Items That Store Well in a Storage Unit
Think about items around the house you use only a few weeks out of the year.
- Seasonal decor and holiday bins
- Sports and camping gear
- Extra furniture you may use later
- Family keepsakes packed in sturdy, labeled bins
Items to Rethink Before Storing
If an item is broken, a duplicate of something you already own, or something you forgot you owned because you never reach for it, it likely belongs in the Donate or Toss box. Paying to store clutter only moves the problem to a new address. Ask the storage facility which items, like flammable objects and food, are not allowed to be stored in a storage facility, so you can plan ahead.
See How Storage Sense Helps You Stay Organized
A little extra storage space off your main property can make a huge difference in way you are able to organize your primary living and storage spaces. Find a Storage Sense location near you for affordable, secure storage.
What Type of Self Storage Does Storage Sense Offer?
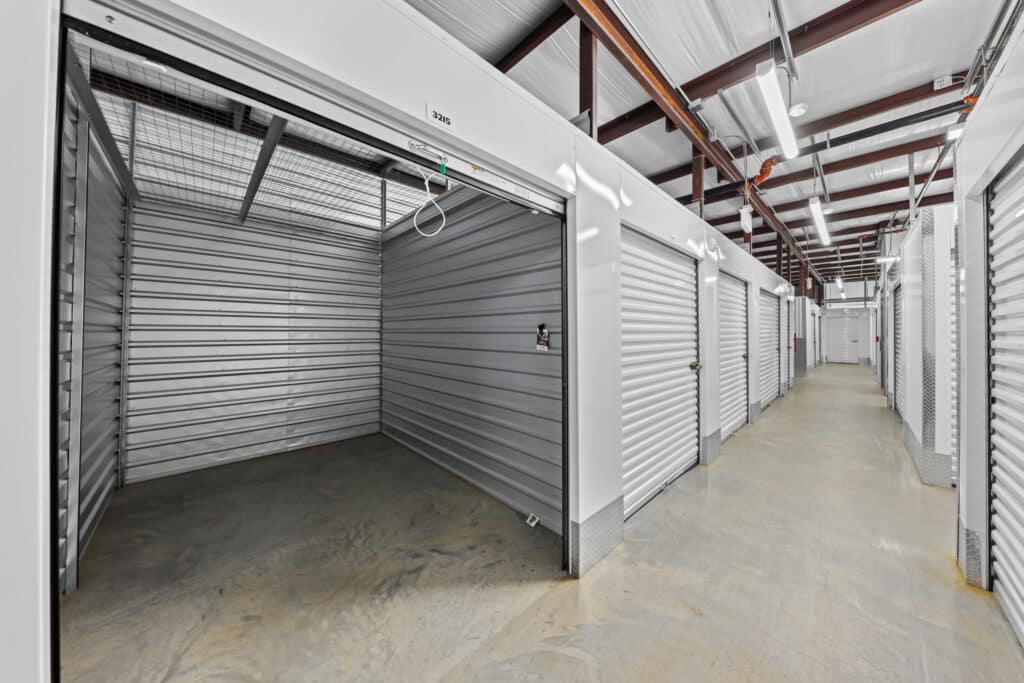
Storage Sense offers several basic types of storage to fit what you are keeping. Climate-controlled storage and temperature-controlled storage help protect sensitive items like photos, documents, fabrics, and wood furniture from extreme heat and cold. Indoor storage units like these open to the inside the building, while drive-up storage units open to the outside and let you pull right up to your door for easy loading.
We also offer vehicle parking options, including RV storage and boat storage. Business owners can also use our self storage for business inventory and files.
Availability varies by location, so check with your local Storage Sense facility for our current selection.
What Storage Unit Size Do You Need?
Use the list of items you made on Day 29 to estimate how much space you need. Count large pieces first, such as furniture. Then count your boxes. Compare your list with Storage Sense’s storage unit size guide, and ask your local team for help if you land between sizes. You can also visit our online storage calculator for an instant size suggestion.

